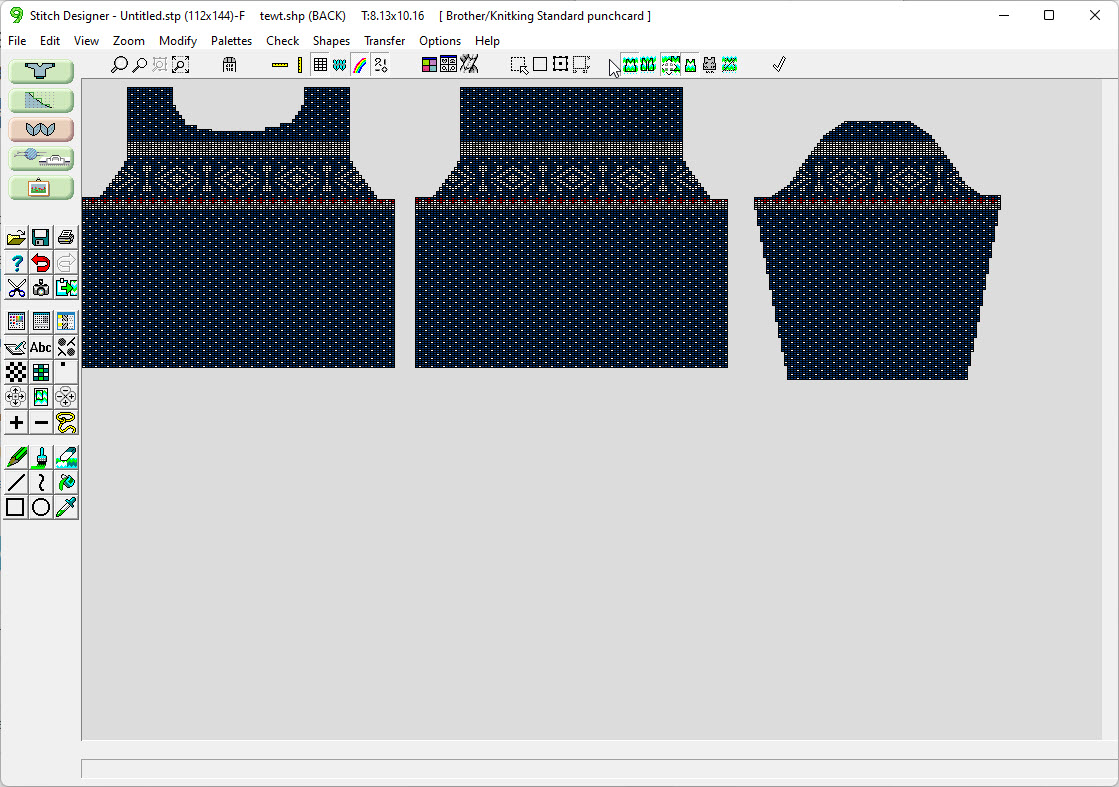
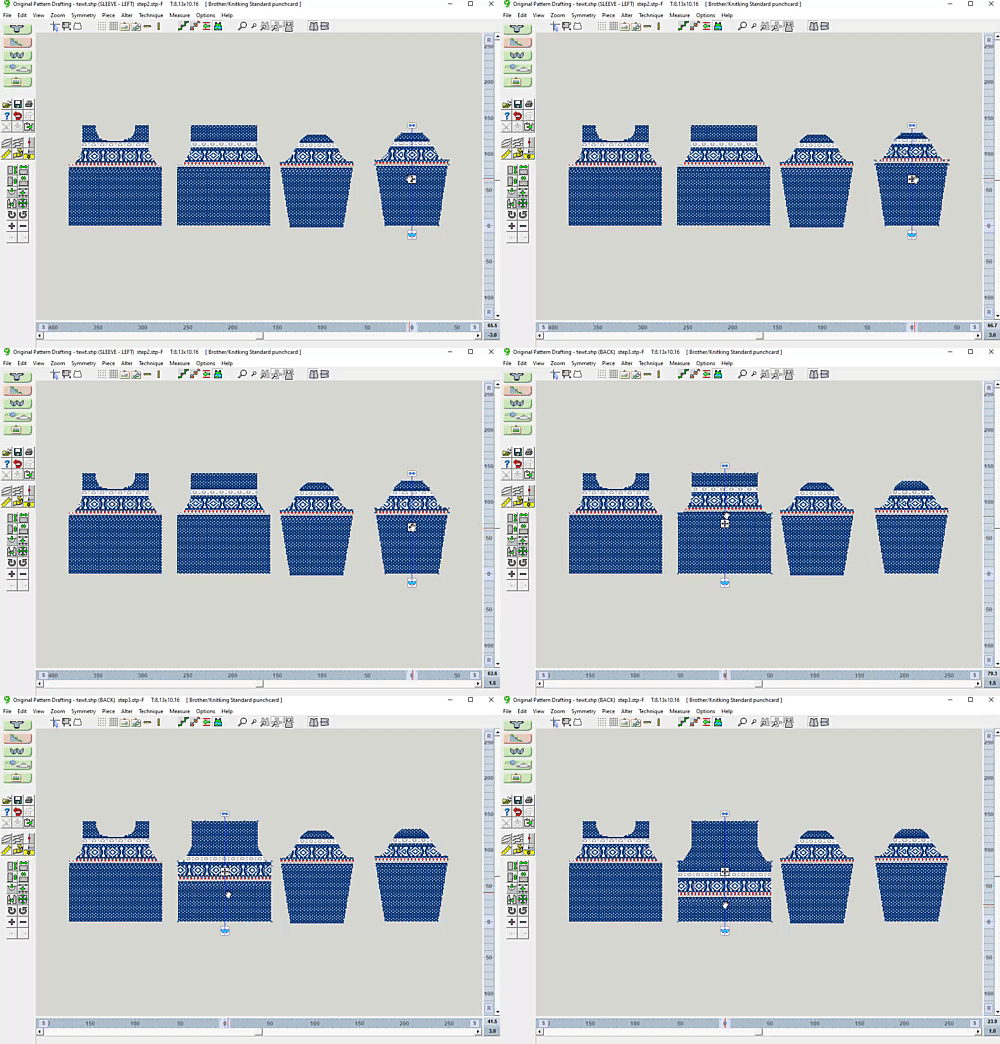
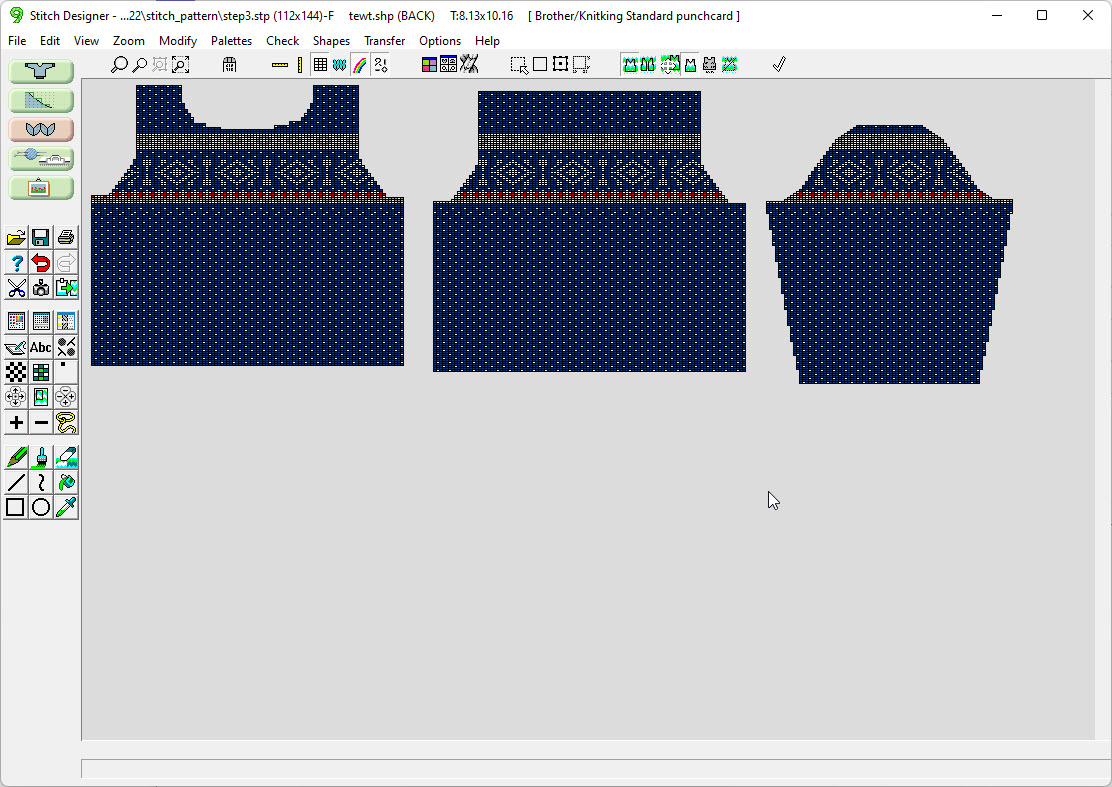
By integrating the stitch patterns with the garment shapes, we can precisely position the stitch patterns to copy the original design.
Position the Stitch Patterns
Overview: Integrate Stitch Patterns with Shapes
You've created garment shapes. You've perfected the stitch pattern. Now put them together so DesignaKnit can produce accurate knitting instructions.
Position the Stitch Patterns
Quick 'n Easy
Step 1:
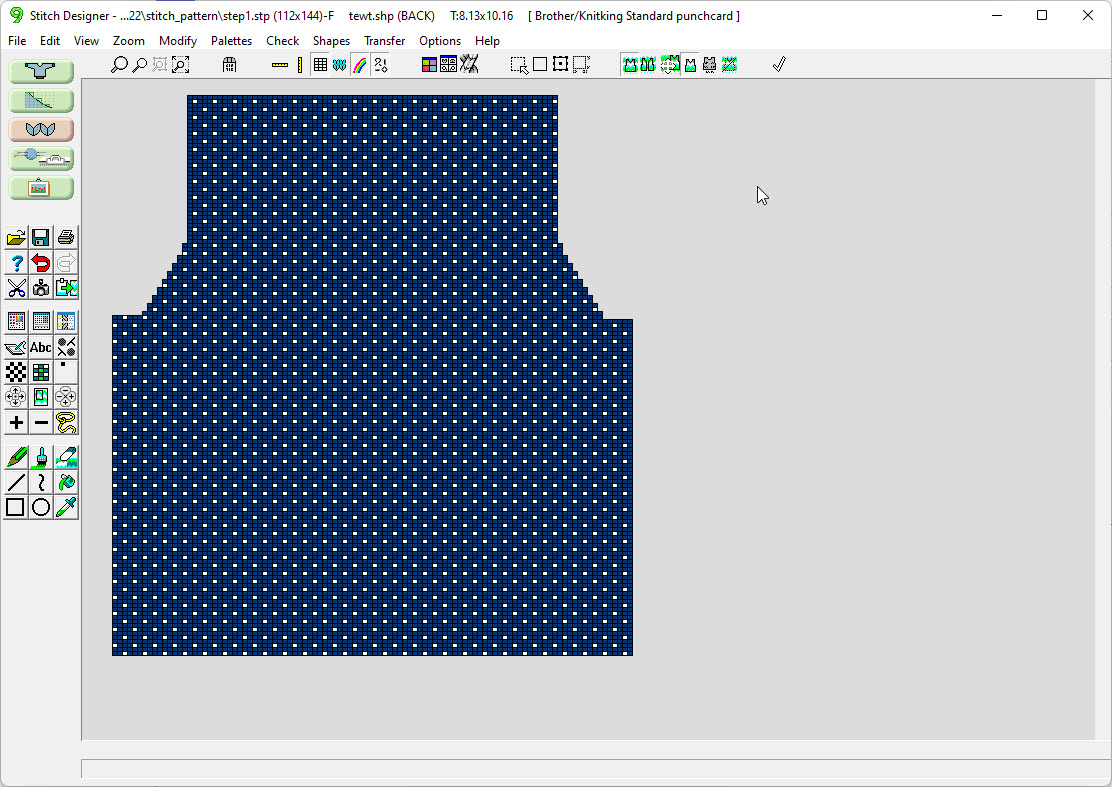
Use Stitch Designer to position (integrate) just the Birds Eye stitch pattern on garment pieces.
Step 2
will add the Fairisle border
Position the Stitch Patterns
Put 2 Patterns Together
Step 2: Using Stitch Designer, put both stitch patterns together to integrate with the garment pieces.
Position the Stitch Patterns
Don't Skip This
When creating multiple color stitch patterns, it's easy to get stumped by DesignaKnit.
The concept of selected and de-selected needles (long and short needle icons) can be confusing and keep you from creating your own patterns.
It's important that you understand WHY DesignKnit uses this concept and how to work around any confusion.
Position the Stitch Patterns
Integrate with Original Pattern Drafting
For all-over stitch patterns, we can integrate them with garment pieces using Original Pattern Drafting.
But there are limitations.
integration
For our Fairisle project, now that we've created an all-over stitch pattern, it can be manipulated in Original Pattern Drafting.
This is the perfect place to integrate the stitch pattern with a pocket or other garment pieces.
Position the Stitch Patterns
Compare: Stitch Desginer versus Original Pattern Drafting
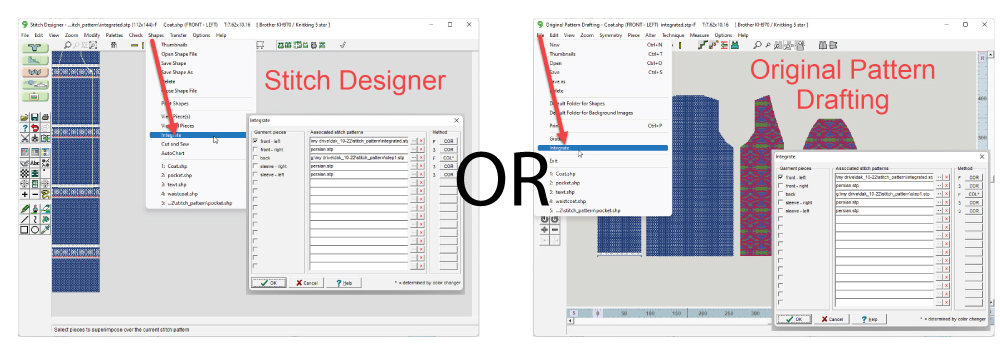
We can integrate and position stitch patterns in Original Pattern Drafting or Stitch Designer. Each method has it's advantages.
Take time to determine which one works for your garment design.
We can integrate and position stitch patterns in Original Pattern Drafting or Stitch Designer. Each method has it's advantages.
Take time to determine which one works for your garment design.
Stitch Designer versus Original Pattern Drafting
Position the Stitch Patterns
Your Turn: Position your Stitch pattern
Using the garment pieces and the stitch patterns you created previously, integrate your stitch patterns.
1
Position the Bird’s-eye Pattern on Your Pieces
Open Stitch Designer
Create a new pattern
> File
> New Pattern Setup
> Set size from pattern piece
Select the largest piece, the Back
Import the Bird’s-eye stitch pattern
> Edit
> Import
> Tile
Press Enter
Cut pieces out to preview
Save as Step 1
2
Position the Border Stitch Pattern
Use your Step 1 file
Make sure all border colors are opaque
Import the border stitch pattern
> Edit
> Import
> Horizontal Border
Use the Up Arrow key to position the border
Press Enter to place it
Select pieces to display
Use the Move tool to position the pieces
Save as Step 2
3
Position the Stitch Pattern on the Pocket
Open Original Pattern Drafting
Open your garment shape file
Add your pocket piece
> Piece
> Import Piece
Integrate the pocket piece with your Step 2 stitch pattern
> File
> Integrate
Left-click to move the pocket piece
Click the Move icon to position the stitch pattern
Add a Pocket
Position the Stitch Patterns
Select a lesson from the menu above to get started.