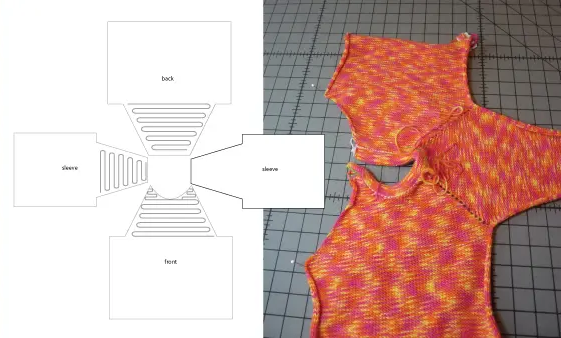
Top-Down Raglan sweaters are popular with knitters. They are fast and offer lots of design opportunities with decorative seams along the raglan sleeves.
With just a few steps use DesignaKnit to accurately chart your Top-Down Raglan pattern.
Chart a Machine-Knit Top Down Raglan
Traditional Top Down Knitting Sequence
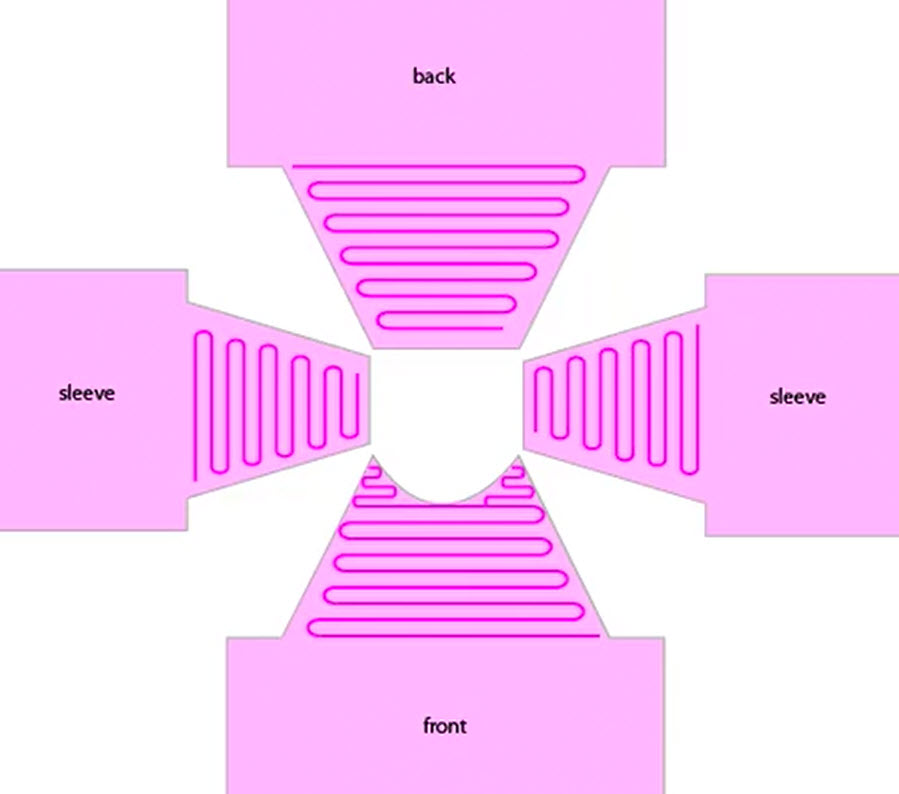
Construction of traditional top down raglans: (remember the right and left sleeves are different (the shaping is reversed)
Knit a neck band, marking the stitches for the neck opening of each piece
Pick up the neck opening stitches for a sleeve
Knit the sleeve "top down" from the instructions, shaping the raglan sleeve cap and the shaping for the body of the sleeve
Pick up the neck edge stitches for the back (or front)
Shape the neckline AND AT THE SAME TIME pick up the edges of the raglan sleeve edge as you knit. (sew as you go)
Continue knitting the back (or front), shaping the armhole and body as instructed
Pick up the neck edge stitches for the 2nd sleeve
Shape the neckline and raglan sleeve cap AND AT THE SAME TIME pick up the edges of the back (or front) as you knit. (sew as you go)
Pick up the neck edge stitches for the remaining piece (front or back)
Shape the neck opening AND AT THE SAME TIME pick up the edges of both sleeves as you knit (sew as you go)
When the knitting is complete, the neckband seam is finished as well as the underarm and sleeve seams.
Chart a Machine-Knit Top Down Raglan
Top Down instructions with DesignaKnit
Use DAK to easily create a top down Sweater.
Chart a Machine-Knit Top Down Raglan
Chart the Neckband
When we create a Raglan sweater, DesignaKnit doesn't automatically create a neck band piece.
Traditional Top-Down Raglan sweaters are constructed by picking up stitches from a neckband (or scrap yarn)
and the body and sleeves are knit from the top down.
To create our own pattern, we need to manually create a piece in original pattern drafting.
Chart a Machine-Knit Top Down Raglan
Select a lesson from the menu above to get started.